Getting started
Requirements
- macOS 14 Sonoma or later.
- Location access is optional.
- Ambient Light requires a compatible light sensor detected by ChillScreen.
Installation
Open the downloaded ChillScreen file and drag the app into Applications. Open ChillScreen from Applications, then look for its icon in the menu bar.
ChillScreen is not notarized by Apple. If macOS blocks the first launch, try opening the app once, then go to System Settings → Privacy & Security, scroll to Security, and choose Open Anyway. Confirm Open if asked.
First setup
- Click the ChillScreen icon in the macOS menu bar and open Daily Cycle.
- Set your typical Wake, Evening, and Bedtime.
- Choose Automatic or Manual.
- Optionally enable Location, Ambient Light, Learning, or Launch at Login.
- Turn ChillScreen On from the menu-bar menu.
Trial and license
Try all features for 14 days without payment details. There is no automatic charge. A one-time purchase covers one Mac, with no subscription.
Activate your license
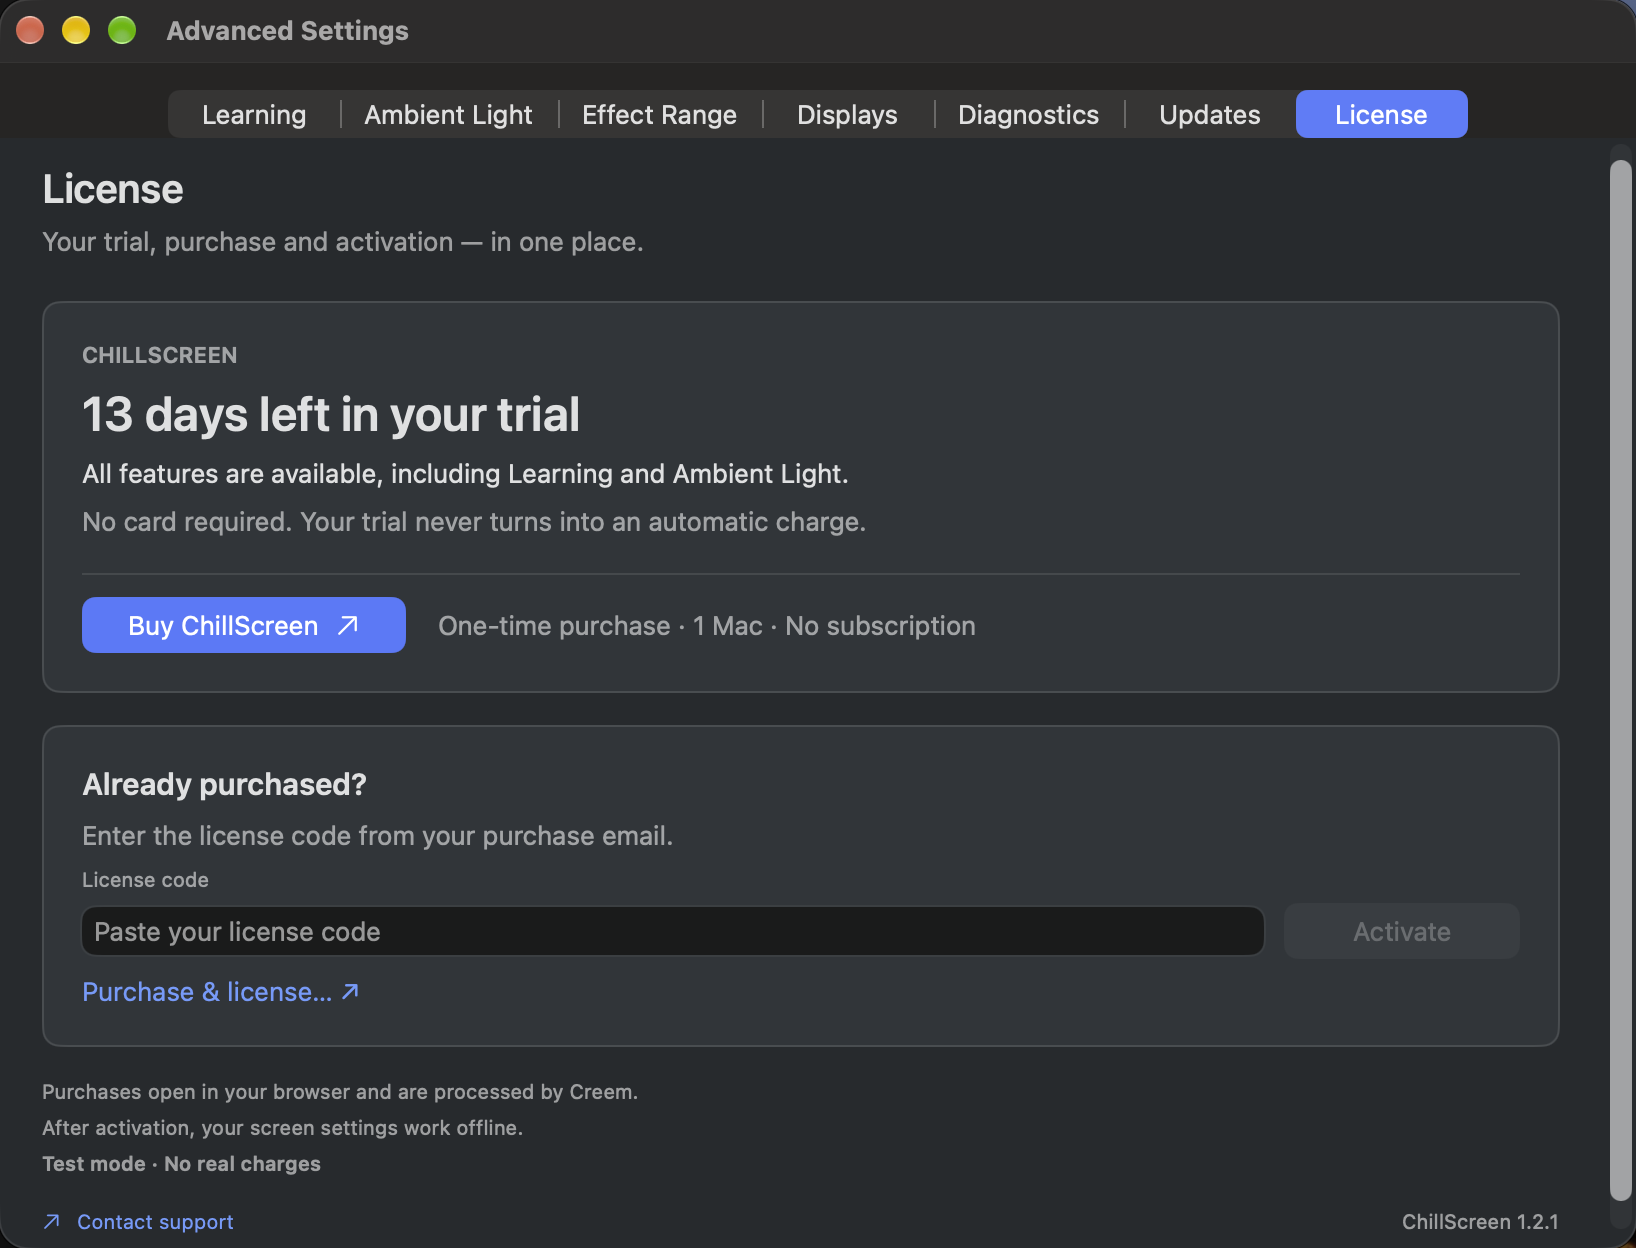
Purchases are handled by Creem. Find your license key in your order, then open Advanced Settings → License, paste it into License code, and choose Activate. Connect to the internet for activation; you can then use ChillScreen offline.
If your key is not accepted
Copy the complete license key, not the order number, and check your internet connection. Each license is for one Mac and cannot be switched between computers. If you still need help, contact support.
Find your purchase
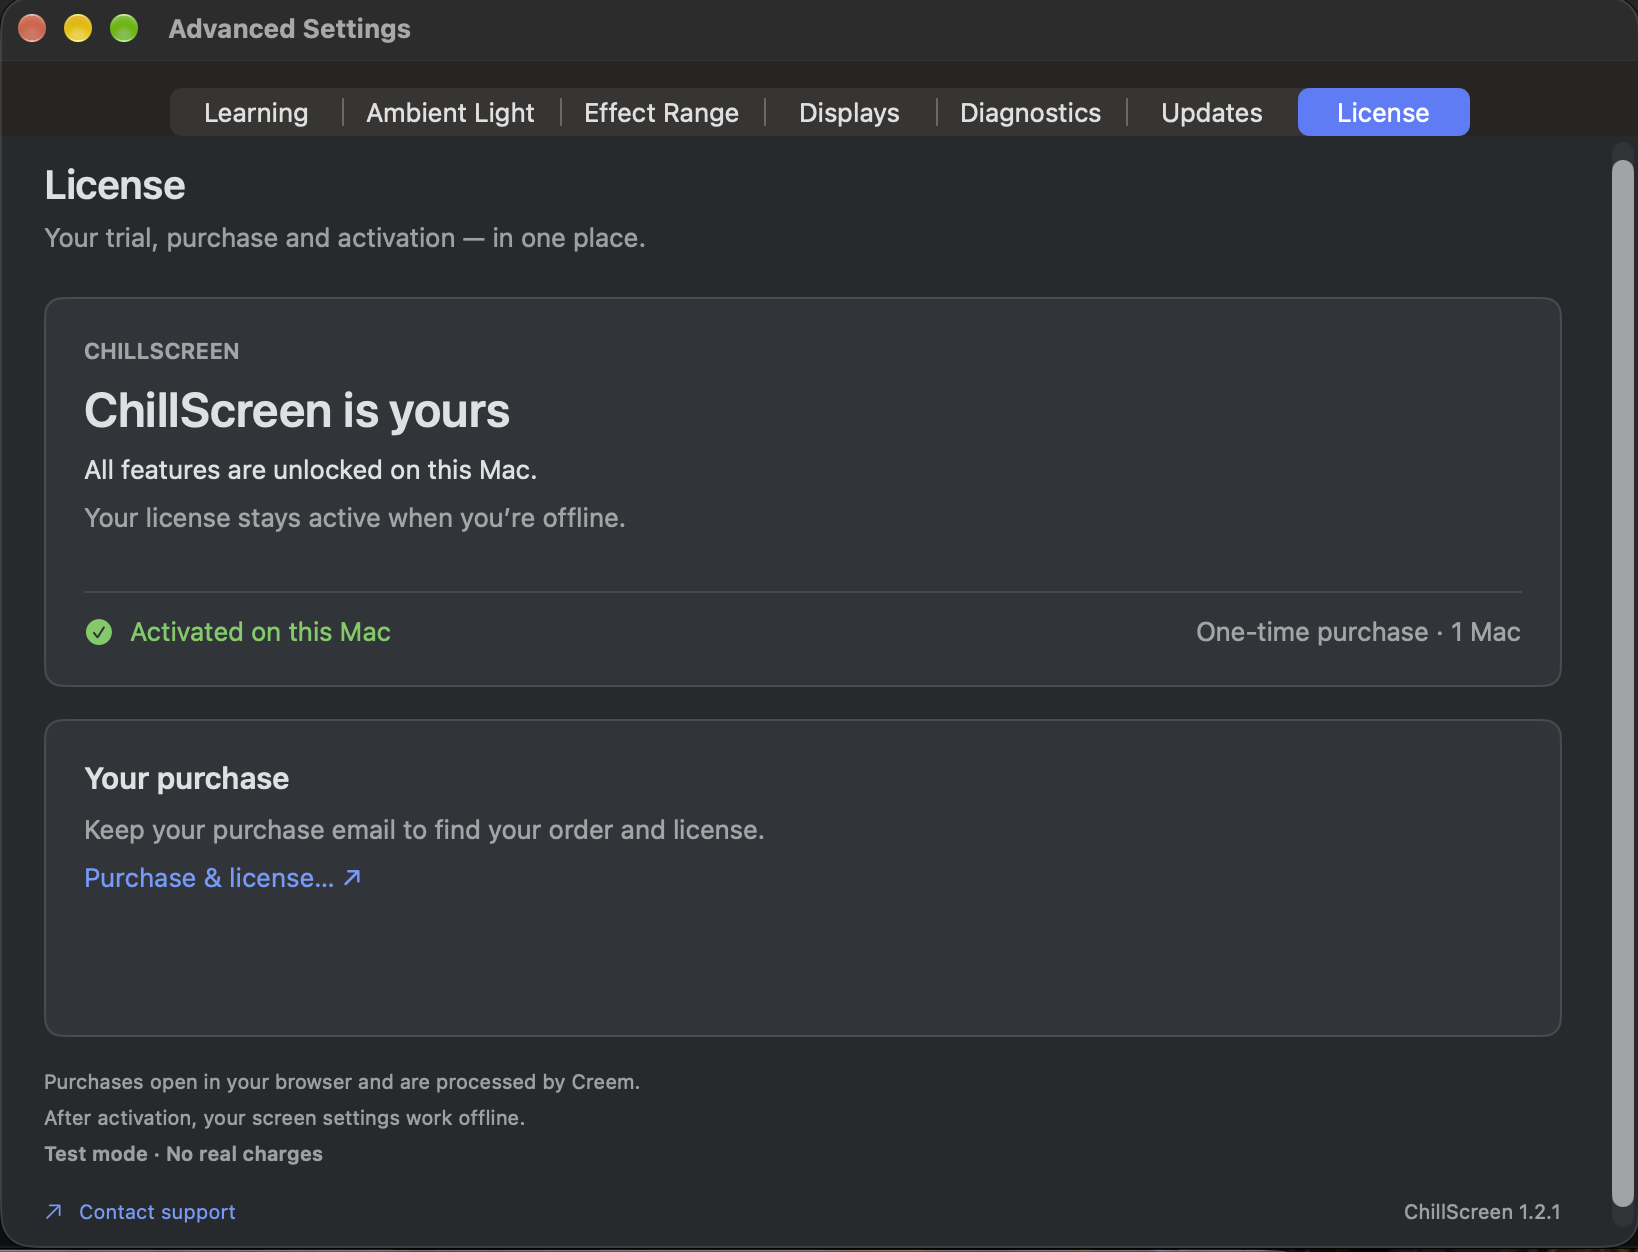
Choose Purchase & license… in ChillScreen and use your purchase email address. Check your spam folder for the sign-in email. For purchase or refund questions, contact support with your order number.
When the trial ends
Without an active license, ChillScreen restores your displays and stops applying effects. Your schedule, preferences, and learning history are kept. Activate a license to continue.
Menu-bar status and controls
Click the ChillScreen menu-bar icon. On toggles display effects; its checkmark indicates that effects are enabled. When Off, the compact menu hides the live effect readouts. When On, additional status, effect levels, and an available ambient-light reading can appear.
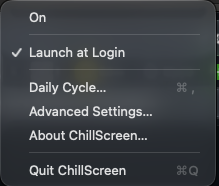
The menu also contains Launch at Login, Daily Cycle…, Advanced Settings…, About ChillScreen…, and Quit ChillScreen. Open Daily Cycle with Command-comma. Off and Quit restore the displays affected by ChillScreen.
Launch at Login
Select Launch at Login in the menu-bar menu to start ChillScreen when you sign in to your macOS account. A checkmark means macOS reports it as enabled. This is separate from On: opening the app automatically does not mean its effects are currently enabled, and it does not extend an expired trial.
If macOS requires approval, the menu shows Allow Launch at Login…. Choose it to open the system's Login Items settings and approve ChillScreen. Return to the menu to check the status. Registration errors appear in the menu rather than silently enabling the option.
Keep ChillScreen in Applications, not inside the mounted DMG or a temporary folder. To stop automatic launching, uncheck Launch at Login. Quitting the app stops it for the current session but does not disable the next login launch.
Daily Cycle
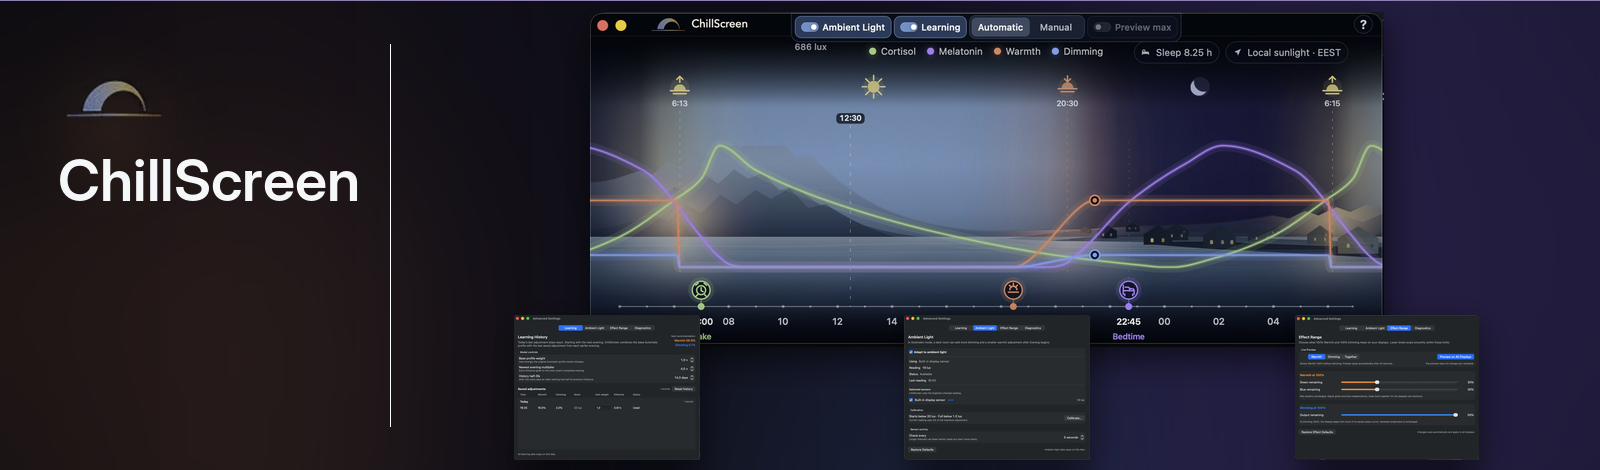
Daily Cycle puts the whole 24-hour schedule on one shared timeline. It shows Wake, Evening, Bedtime, optional local sunrise and sunset, and four curves:
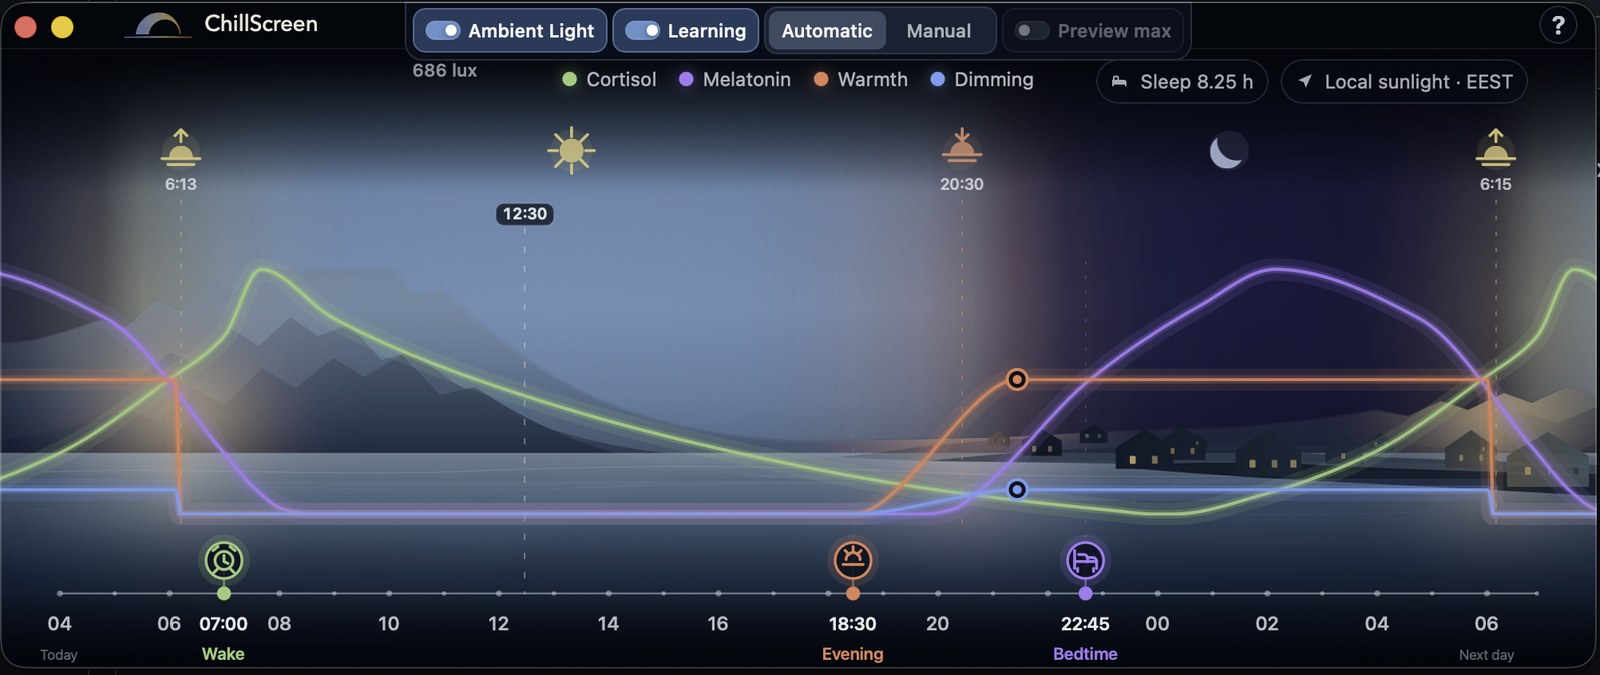
- Warmth in orange;
- Dimming in blue;
- Cortisol reference context in green;
- Melatonin reference context in purple.
The Cortisol and Melatonin curves are normalized, research-informed reference profiles. They are not measurements of your individual hormone levels.
Drag Wake, Evening, and Bedtime horizontally along the timeline. You can also select a marker and use the keyboard for finer control. Automatic and Manual keep separate schedules and restore the values saved for each mode.
Scheduled Warmth and Dimming end at Wake, local sunrise (when available), or 06:00—whichever comes first.
Warmth and Dimming
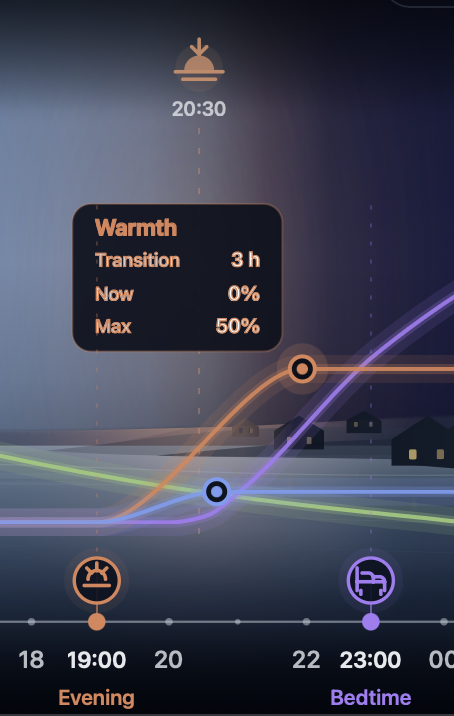
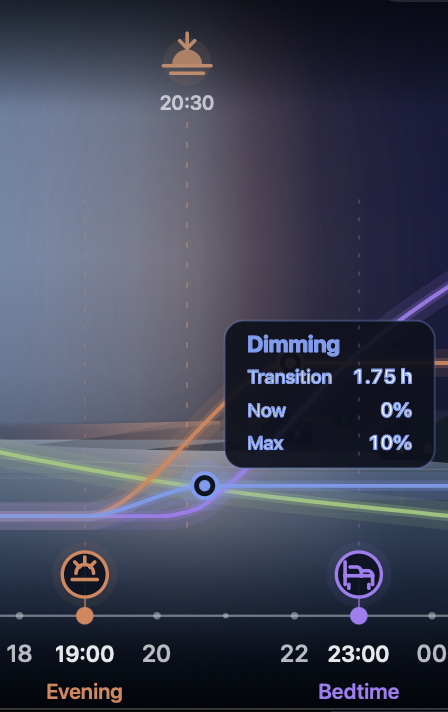
Warmth shifts the display toward warmer, redder tones. Dimming reduces perceived brightness. They are independent, so each can use its own maximum strength and transition duration.
In Manual mode, drag an effect handle vertically to change its maximum and horizontally to change how long the transition takes from Evening to that maximum. The temporary card shows Transition, Now, and Max.
Automatic mode
Automatic manages Warmth and Dimming throughout the day. You can still move Wake, Evening, and Bedtime. Depending on your configuration, its calculation can include:

- your daily schedule and current time;
- optional local sunrise and sunset;
- optional Ambient Light and the current lux level;
- locally learned preferences when Learning is enabled.
Location permission is optional. If granted, ChillScreen stores coordinates locally to calculate sunrise and sunset; it does not maintain a location history.
Manual mode and Preview max
Manual gives direct control over both curves. Use it when you want a specific transition or maximum effect, are testing a comfortable setting, or the current environment is unusual.

Preview max temporarily applies the strongest Warmth and Dimming configured in Manual. It checks the result without changing the current point in the daily cycle.
Ambient Light
Open Advanced Settings → Ambient Light. In Automatic mode, a darker room can add extra Dimming and Warmth after Evening begins. Ambient Light is independent of Learning and does not operate in Manual mode.
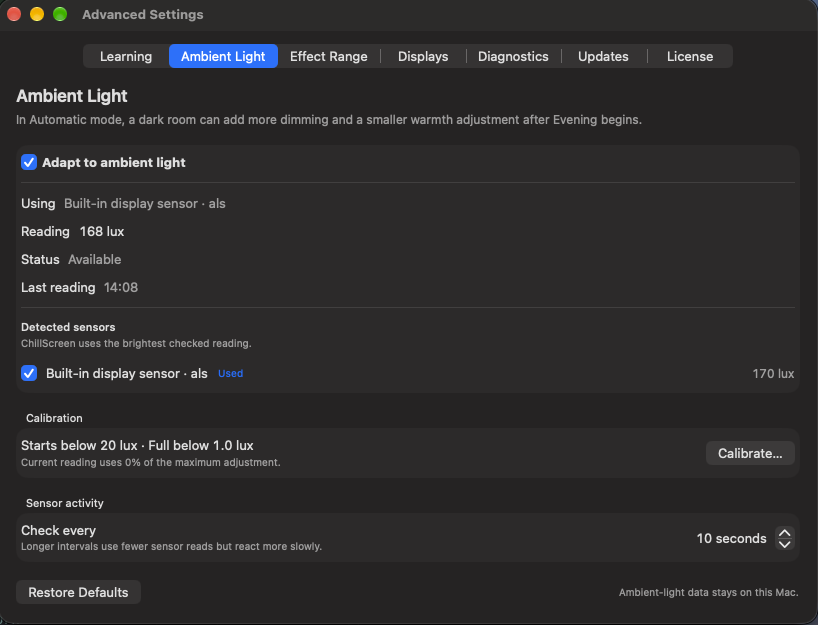
When several checked sensors are available, ChillScreen uses the brightest checked reading. You can exclude individual sensors.
Using, Reading, Status, and Last reading explain which sensor is contributing. Check every controls the polling interval: longer intervals use fewer sensor reads but react more slowly. Restore Defaults resets the ambient-light settings.
Calibration
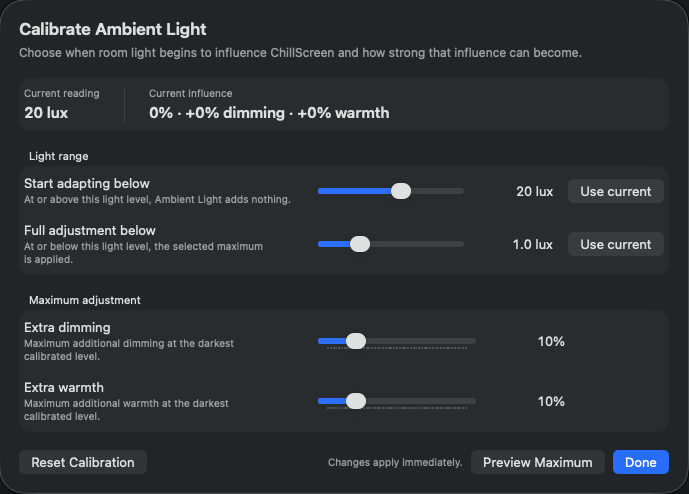
- Start adapting below is the level at or above which room light adds nothing.
- Full adjustment below is the level at or below which the selected maximum is applied.
- Extra dimming and Extra warmth set the maximum additions at the darkest calibrated level.
- Use current copies the current sensor reading into a threshold.
Between the thresholds, influence increases progressively as the room gets darker. Preview Maximum checks the strongest configured ambient effect. If readings stop, ChillScreen keeps the last valid reading instead of inventing a room-light change.
Learning
Learning uses evening adjustments to refine future Automatic recommendations. It is optional, transparent, and local.
Learning handles are available when ChillScreen is On, Automatic and Learning are selected, and the current time is between Evening and the earlier of Wake or 06:00. Your display changes immediately while you drag.
After you stop, ChillScreen waits ten seconds and saves the latest values for that evening. Your choice remains exact today; it influences the recommendation for the next evening. If you adjust several times in one evening, the latest saved record represents that evening, while earlier records remain visible as replaced.
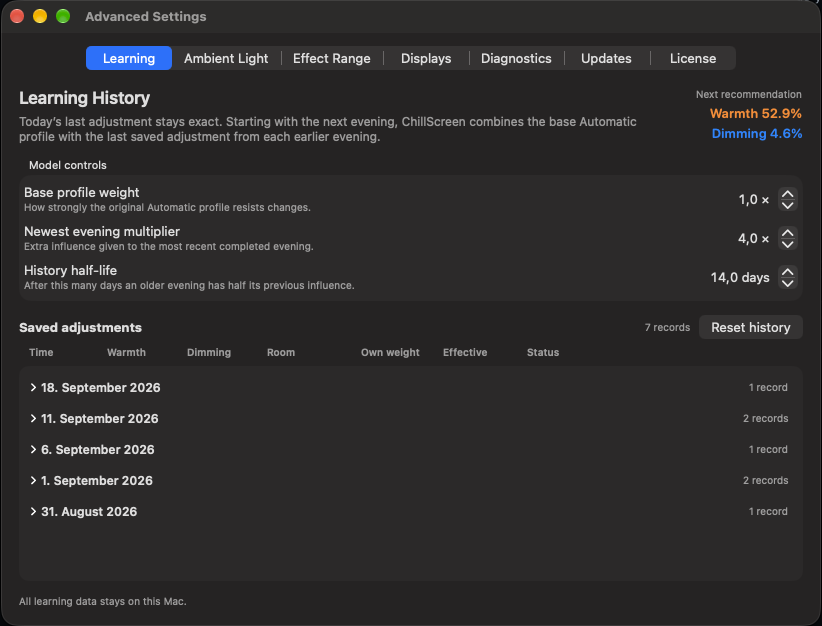
Learning History exposes the base-profile weight, newest-evening multiplier, history half-life, individual record weights, effective influence, Undo, and Reset history. Ambient Light is stored separately so temporary room conditions are not learned as a permanent preference.
Expand an evening to see its records. Base profile weight controls how strongly the original Automatic profile resists changes. Newest evening multiplier gives the most recently completed evening extra influence. History half-life is the number of days after which an older evening has half its influence. Next recommendation shows the resulting Warmth and Dimming. Reset history clears learned history; it is not a reset of all app settings.
Effect Range
Open Advanced Settings → Effect Range to define what 100% Warmth and 100% Dimming mean on your displays.
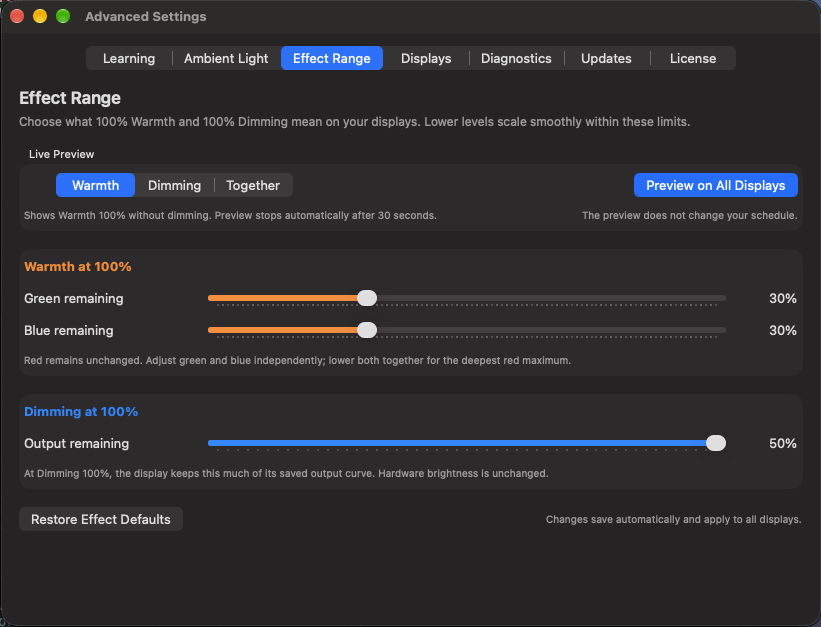
Green and Blue remaining can be adjusted independently; lowering both creates a deeper red maximum. Output remaining controls the darkest software Dimming maximum. These settings define the range — they do not set the current effect level.
Select Warmth, Dimming, or Together, then Preview on All Displays. Preview stops automatically after 30 seconds and does not change your schedule. Red remains unchanged by the warmth range controls; software dimming does not change hardware brightness. Changes save automatically and the range is shared by all displays. Restore Effect Defaults resets this range, not your schedule.
Multiple displays
Open Advanced Settings → Displays. By default, Individual display adjustments is off and all connected displays follow your shared settings. Enable it to fine-tune individual screens without duplicating your schedule.
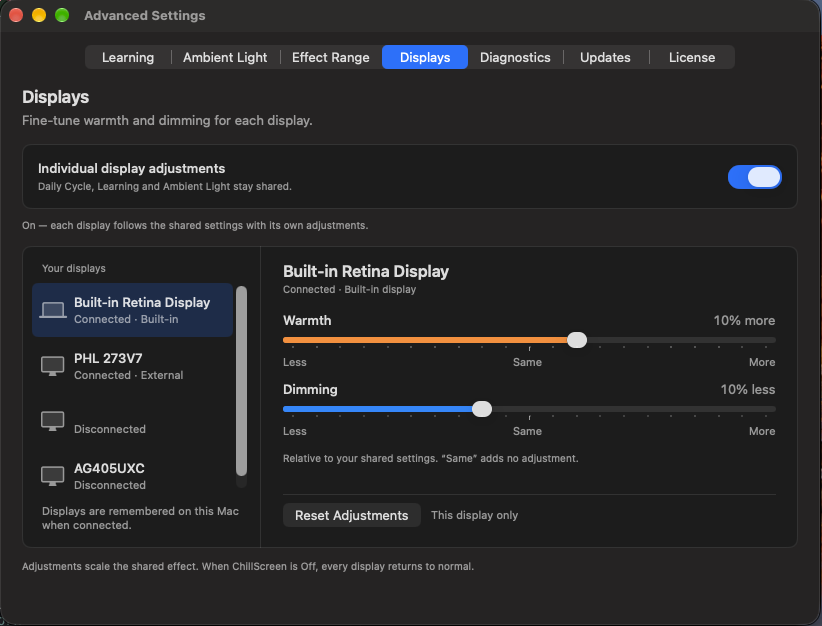
- Select a display under Your displays.
- Move Warmth or Dimming toward Less or More. Same adds no adjustment.
- Use Reset Adjustments to reset only the selected display.
These adjustments scale the shared effect; they are not independent schedules or extra percentage points. Daily Cycle, Learning, Ambient Light, and Effect Range remain shared. When the shared effect is zero, a display adjustment does not create an effect of its own.
Previously connected displays remain in the list on this Mac. Disconnected displays can be viewed but their controls are unavailable until they reconnect. Saved adjustments are reused when a display is recognized again. Switching individual adjustments off keeps the saved values but stops applying them.
Turning ChillScreen Off or quitting restores each display to its original appearance.
Updates and turning the app off
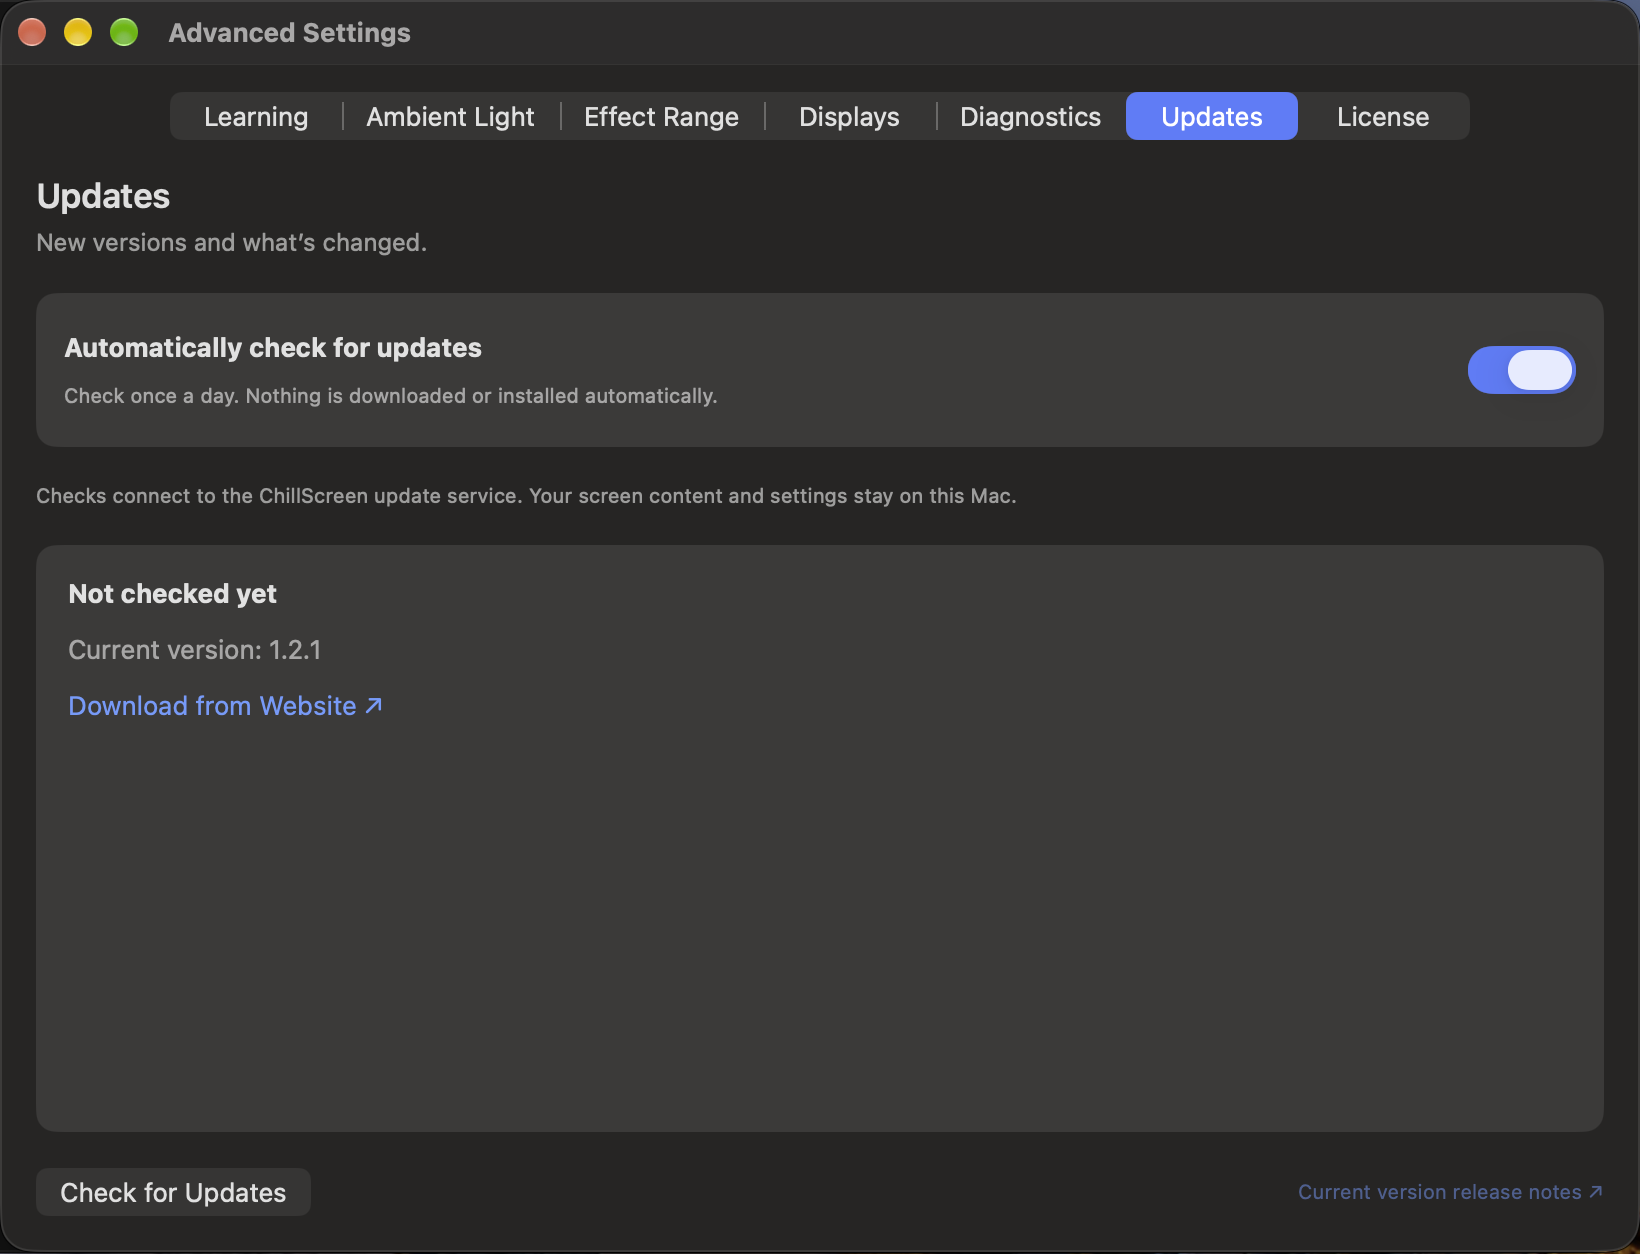
ChillScreen does not install updates automatically. If your version has Advanced Settings → Updates, you can enable a daily automatic check or press Check for Updates at any time. The first launch of a version with this feature asks whether you want automatic checks; Not Now leaves them off.
The Updates section shows the available version and what changed. Automatic checks can show a small update notice. Later postpones the reminder for seven days; Skip This Version stops reminders for that release. A manual check or View Update can still show a skipped release. Updates that need a newer macOS show an explanation and release notes instead of a download button.
Choose Download to get an update, then Open DMG when the download finishes. You can also use Download from Website. Updates are not downloaded or installed automatically.
Open the DMG, quit ChillScreen, replace it in the same Applications folder where you installed it, and launch it again. Preferences and Learning history are stored separately and remain available.
Turning ChillScreen Off restores affected displays without deleting your settings. After the 14-day trial, an active license is required to apply effects.
Permissions and privacy
ChillScreen does not capture or analyze screen contents. Location, schedules, Learning, Ambient Light preferences, and calibration remain local.
Troubleshooting
The screen does not change
Check that ChillScreen is On, your trial or license is active, the current Warmth or Dimming value is above 0%, and the selected mode contains the settings you intended. For one unexpectedly different monitor, also check its Displays adjustments.
Sunrise or sunset looks wrong
Enable optional Location access and check that macOS is using the correct time zone.
Learning controls do not appear
Confirm that the app is On, Automatic is selected, Learning is enabled, and the time is inside the evening learning window.
Ambient Light is unavailable
Some Macs expose their sensor only while the built-in display is open and active. In Advanced Settings, confirm that at least one detected sensor is enabled and wait for the selected polling interval. Automatic continues normally without a reading.
Diagnostics and support
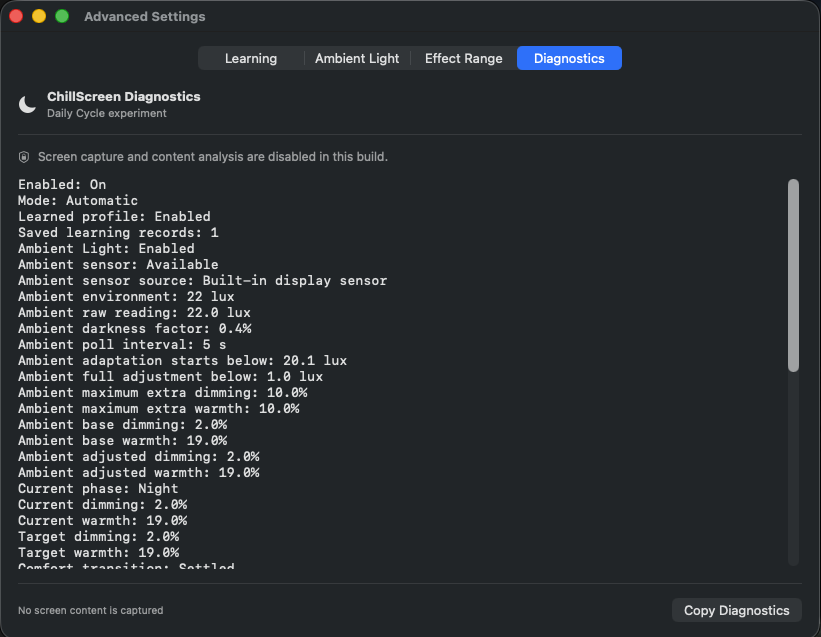
If something is not working, open Advanced Settings → Diagnostics and choose Copy Diagnostics. This helps us understand the problem.
Contact support
Email chillscreenapp@gmail.com. Tell us what happened and include your macOS version, app version, and any error message. For display problems, mention your connected monitors and include the copied diagnostics.
For purchase questions, include your order number. Please remove private details from screenshots and diagnostics, and do not send card details, passwords, or sign-in links.